import cv2
import numpy as np
import time
def draw_hist(name, gray):
hist = cv2.calcHist([gray], [0], None, [256], [0,256])
MAX = max(hist)
plot = np.zeros((512,1024))
for i in range(255):
x1 = 4*i
x2 = 4*(i+1)
y1 = int(hist[i]*512/MAX)
y2 = int(hist[i+1]*512/MAX)
cv2.line(plot, (x1,y1), (x2,y2), 1, 3)
cv2.imshow(name + "-gray", gray)
cv2.imshow(name + "-hist", plot)
def main():
cam = cv2.VideoCapture(0)
#while cv2.waitKey(10) == -1:
start_time = time.time()
while time.time() - start_time < 30:
ret, img = cam.read()
if not ret: # add check for empty image
continue
gray = cv2.cvtColor(img, cv2.COLOR_BGR2GRAY)
draw_hist("cam",gray)
cv2.waitKey(10)
if __name__=="__main__":
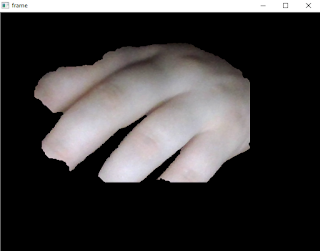
main()
Is a blog about python programming language. You can see my work with python programming language, tutorials and news.
Friday, March 3, 2023
Python 3.11.0 : OpenCV - part 001.
Monday, March 16, 2020
Python 3.5.2 : Detect motion and save images with opencv.
The main goal of this script is to see the difference in various frames of a video or webcam output.
The first frame of our video file will contain no motion and just background and then is compute the absolute difference.
There is no need to process the large, raw images straight from the video stream and this is the reason I convert the image to grayscale.
Some text is put on the window to show us the status string to indicate it is detection.
With this script I detect cars and peoples from my window, see the screenshot with these files:
Let's see the python script:
import argparse
import datetime
import imutils
import cv2
import time
from time import sleep
def saveJpgImage(frame):
#process image
img_name = "opencv_frame_{}.jpg".format(time)
cv2.imwrite(img_name, frame)
def savePngImage():
#process image
img_name = "opencv_frame_{}.png".format(time)
cv2.imwrite(img_name, frame)
# get argument parse
ap = argparse.ArgumentParser()
ap.add_argument("-v", "--video", help="path to the video file")
ap.add_argument("-s", "--size", type=int, default=480, help="minimum area size , default 480")
args = vars(ap.parse_args())
# if no video use webcam
if args.get("video", None) is None:
camera = cv2.VideoCapture(0)
#time.sleep(1.5)
# use video file
else:
camera = cv2.VideoCapture(args["video"])
# frame from video is none
first_frame = None
# loop into frames of the video
while True:
# grab the current frame
(grabbed, frame) = camera.read()
text = "undetected"
# is no frame grabbed the is end of video
if not grabbed:
break
# resize the frame
frame = imutils.resize(frame, width=640)
gray = cv2.cvtColor(frame, cv2.COLOR_BGR2GRAY)
gray = cv2.GaussianBlur(gray, (21, 21), 0)
# is first frame is none , make gray
if first_frame is None:
first_frame = gray
continue
# compute difference from current frame and first frame
frameDelta = cv2.absdiff(first_frame, gray)
first_frame = gray
thresh = cv2.threshold(frameDelta, 1, 255, cv2.THRESH_BINARY)[1]
# dilate the thresholded image to fill in holes
# then find contours on thresholded image
thresh = cv2.dilate(thresh, None, iterations=2)
(cnts, _) = cv2.findContours(thresh.copy(), cv2.RETR_EXTERNAL,
cv2.CHAIN_APPROX_SIMPLE)
# loop contours
for c in cnts:
# if the contour is too small, ignore it
if cv2.contourArea(c) < args["size"]:
continue
# compute the bounding box for the contour
# draw it on the frame,
# and update the text
(x, y, w, h) = cv2.boundingRect(c)
cv2.rectangle(frame, (x, y), (x + w, y + h), (0, 255, 0), 0)
roi = frame[y:y+h, x:x+w]
ts = time.time()
st = datetime.datetime.fromtimestamp(ts).strftime('%d-%m-%Y_%H-%M-%S')
# if the detection is on sized then save the image
if (w > h ) and (y + h) > 50 and (y + h) < 550:
cv2.imwrite(st+"opencv.jpg", roi)
# set text to show on gui
text = "detected"
# draw the text and timestamp on the frame
cv2.putText(frame, "Detect: {}".format(text), (10, 20),
cv2.FONT_HERSHEY_SIMPLEX, 0.5, (0, 0, 255), 2)
cv2.putText(frame, datetime.datetime.now().strftime("%A %d %B %Y %I:%M:%S%p"),
(10, frame.shape[0] - 10), cv2.FONT_HERSHEY_SIMPLEX, 0.35, (0, 0, 255), 1)
#show frame , thresh and frame_Delta
cv2.imshow("Security Feed", frame)
cv2.imshow("Thresh", thresh)
cv2.imshow("Frame Delta", frameDelta)
key = cv2.waitKey(1) & 0xFF
# break from loop with q key
if key == ord("q"):
break
# close camera and windows
camera.release()
cv2.destroyAllWindows()
Monday, April 15, 2019
Using the ORB feature from OpenCV python module.
The algorithm uses FAST in pyramids to detect stable keypoints, selects the strongest features using FAST or Harris response, finds their orientation using first-order moments and computes the descriptors using BRIEF (where the coordinates of random point pairs (or k-tuples) are rotated according to the measured orientation).
One good feature of ORB is the is rotation invariant and resistant to noise.
The ORB descriptor use the Center of the mass of the patch of the Moment (sum of x,y), Centroid (the result of the matrix of all moment) and Orientation ( the atan2 of moment one and two).
One good article about ORB can be found here.
Let's see the script code of this python example:
import cv2
import numpy as np
image_1 = cv2.imread("1.png", cv2.IMREAD_GRAYSCALE)
image_2 = cv2.imread("2.png", cv2.IMREAD_GRAYSCALE)
orb = cv2.ORB_create()
kp1, des1 = orb.detectAndCompute(image_1,None)
kp2, des2 = orb.detectAndCompute(image_2,None)
bf = cv2.BFMatcher(cv2.NORM_HAMMING, crossCheck=True)
matches = bf.match(des1, des2)
matches = sorted(matches, key = lambda x:x.distance)
matching_result = cv2.drawMatches(image_1, kp1, image_2, kp2, matches[:150], None, flags=2)
cv2.imshow("Image 1", image_1)
cv2.imshow("Image 2", image_2)
cv2.imshow("Matching result", matching_result)
cv2.waitKey(0)
cv2.destroyAllWindows()
The script use two file images 1.png and 2.png.The result is an image composed of the two on which the areas of similitude are traced as detected by the mathematical algorithm.
Thursday, December 20, 2018
Python 3.6.4 : Learning OpenCV - centroids.
I studied a little on the internet.
The last aspect was related to centroids.
An example I studied before TV news was from this webpage.
About centroid you can read here.
The result of the source code from a video with Simona Halep.
Sunday, October 21, 2018
OpenGL and OpenCV with python 2.7 - part 006.
This will allow you to make your python module for your webcam.
My reason was to make a good webcam module to work with python modules like OpenCV and OpenGL and webcam devices.
The source code is simple and has just three functions: start, _update_frame and get_current_frame.
You can make more functions into this python module named webcam.
import cv2
from threading import Thread
class webcam:
def __init__(self):
self.video_capture = cv2.VideoCapture(0)
self.current_frame = self.video_capture.read()[1]
# create thread for capturing images
def start(self):
Thread(target=self._update_frame, args=()).start()
def _update_frame(self):
while(True):
self.current_frame = self.video_capture.read()[1]
# get the current frame
def get_current_frame(self):
return self.current_frame
I make also a python script to test this python module:from webcam import webcam
import cv2
dir(webcam)
cam = webcam()
cam.start()
while True:
# get image from webcam
image = cam.get_current_frame()
Saturday, April 28, 2018
Python 3.6.4 : Testing OpenCV default Hough Line Transform.
This can be a good example for Hough Line Transform.
See the source code:
import cv2
import numpy as np
img = cv2.imread('test_lines.jpg')
gray = cv2.cvtColor(img, cv2.COLOR_BGR2GRAY)
# filter black and gray pixels
thresh = cv2.threshold(gray, 100, 255, cv2.THRESH_BINARY_INV)[1]
# find lines
lines = cv2.HoughLinesP(thresh, 1, np.pi/180,360,18)
# output lines onto image
for line in lines:
x1,y1,x2,y2 = line[0]
cv2.line(img,(x1,y1),(x2,y2),(255,255,0),2)
# show image
cv2.imshow('threshold houghlines', img)
cv2.waitKey(0)
cv2.destroyAllWindows()
This is the result for test_lines.jpg .You can test by make changes into this line of code:
lines = cv2.HoughLinesP(thresh, 1, np.pi/180,360,18)
According to documentation, the changes are influenced by the range parameters.Sunday, March 11, 2018
Python 3.6.4 : Testing OpenCV default GrabCut algorithm.
For this tutorial, I chose these python modules: cv2, numpy and matplotlib .
I have tested the GrabCut algorithm article from here.
The article comes with a python script that includes the modules I tested in this programming language.
They tell us:
User inputs the rectangle. Everything outside this rectangle will be taken as sure background (That is the reason it is mentioned before that your rectangle should include all the objects). Everything inside rectangle is unknown. Similarly any user input specifying foreground and background are considered as hard-labelling which means they won't change in the process.
From my point of view, it is not a very successful algorithm to crop off the background but is working well.
import numpy as np
import cv2
from matplotlib import pyplot as plt
img = cv2.imread('test_python_opencv.jpg')
mask = np.zeros(img.shape[:2],np.uint8)
bgdModel = np.zeros((1,65),np.float64)
fgdModel = np.zeros((1,65),np.float64)
rect = (57,58,476,741)
cv2.grabCut(img,mask,rect,bgdModel,fgdModel,5,cv2.GC_INIT_WITH_RECT)
mask2 = np.where((mask==2)|(mask==0),0,1).astype('uint8')
img = img*mask2[:,:,np.newaxis]
plt.imshow(img),plt.colorbar(),plt.show()
The intersection areas are eliminated exactly as in the documentation.See my first test on an image taken from the internet.
Tuesday, December 5, 2017
Fix PyCharm error install python module from conda .
As you know :
Conda is an open source package management system and environmental management system that runs on Windows, macOS and Linux.
Also, Conda quickly installs, runs and updates packages dependency and environment management for any language—Python, R, Ruby, Lua, Scala, Java, JavaScript, C/ C++, FORTRAN.
This error is from PyCharm install python modules using error check from PyCharm (Alt+Enter keys):
The result of this install come with this error from conda :
Close your PyCharm and use this command into your shell-like administrator:
C:\WINDOWS\system32>conda config --show
C:\WINDOWS\system32>conda config --set force True
C:\WINDOWS\system32>conda update conda
C:\WINDOWS\system32>conda install conda anaconda
Fetching package metadata .............
Solving package specifications: .
# All requested packages already installed.
# packages in environment at C:\Users\catafest\Miniconda3:
#
anaconda 5.0.1 py36h8316230_2
conda 4.3.30 py36h7e176b0_0
C:\WINDOWS\system32>conda update --prefix C:\Users\catafest\Miniconda3 anaconda
Fetching package metadata .............
Solving package specifications: .
Package plan for installation in environment C:\Users\catafest\Miniconda3:
The following packages will be UPDATED:
conda-env: 2.6.0-0 --> 2.6.0-h36134e3_1
Proceed ([y]/n)? y
conda-env-2.6. 100% |###############################| Time: 0:00:00 163.59 kB/s
This command installs anaconda and updates it using my account catafest .Start the I.D.E. PyCharm and after indexing all you can try to fix the python install module (Alt+Enter keys).
If the python modules are not into conda repo from PyCharm then you can use this command:
C:\WINDOWS\system32>conda install -c conda-forge opencv
Fetching package metadata ...............
Solving package specifications: .
# All requested packages already installed.
# packages in environment at C:\Users\catafest\Miniconda3:
#
opencv 3.3.0 py36_202 conda-forge
In this example I used OpenCV python module named into python script like cv2, see the next image:Friday, May 26, 2017
OpenGL and OpenCV with python 2.7 - part 005.
You can use the same steps for other versions of python.
Get the wheel binary package opencv_python-3.2.0.7-cp27-cp27m-win32.whl from here.
C:\Python27>
C:\Python27>cd Scripts
C:\Python27\Scripts>pip install opencv_python-3.2.0.7-cp27-cp27m-win32.whl
Processing c:\python27\scripts\opencv_python-3.2.0.7-cp27-cp27m-win32.whl
Requirement already satisfied: numpy>=1.11.1 in c:\python27\lib\site-packages (from opencv-python==3.2.0.7)
Installing collected packages: opencv-python
Successfully installed opencv-python-3.2.0.7
C:\Python27\Scripts>python
Python 2.7.13 (v2.7.13:a06454b1afa1, Dec 17 2016, 20:42:59) [MSC v.1500 32 bit (Intel)] on win32
Type "help", "copyright", "credits" or "license" for more information.
Let's test it with default source code:
>>> import cv2
>>> dir(cv2)
['', 'ACCESS_FAST', 'ACCESS_MASK', 'ACCESS_READ', 'ACCESS_RW', 'ACCESS_WRITE',
'ADAPTIVE_THRESH_GAUSSIAN_C', 'ADAPTIVE_THRESH_MEAN_C', 'AGAST_FEATURE_DETECTOR_AGAST_5_8',
'AGAST_FEATURE_DETECTOR_AGAST_7_12D', 'AGAST_FEATURE_DETECTOR_AGAST_7_12S',
'AGAST_FEATURE_DETECTOR_NONMAX_SUPPRESSION', 'AGAST_FEATURE_DETECTOR_OAST_9_16',
...
Now we can test this python script example with PyQt4 python module and cv2.resize function very easy.The example loads an image with PyQt4 python module.
from PyQt4.QtGui import QApplication, QWidget, QVBoxLayout, QImage, QPixmap, QLabel, QPushButton, QFileDialog
import cv2
import sys
app = QApplication([])
window = QWidget()
layout = QVBoxLayout(window)
window.setLayout(layout)
display = QLabel()
width = 600
height = 400
display.setMinimumSize(width, height)
layout.addWidget(display)
button = QPushButton('Load', window)
layout.addWidget(button)
def read_image():
path = QFileDialog.getOpenFileName(window)
if path:
print str(path)
picture = cv2.imread(str(path))
if picture is not None:
print width, height
picture = cv2.resize(picture, (width, height))
image = QImage(picture.tobytes(), # The content of the image
picture.shape[1], # The width (number of columns)
picture.shape[0], # The height (number of rows)
QImage.Format_RGB888) # The image is stored in 3*8-bit format
display.setPixmap(QPixmap.fromImage(image.rgbSwapped()))
else:
display.setPixmap(QPixmap())
button.clicked.connect(read_image)
window.show()
app.exec_()
See the result for this python script:Saturday, February 25, 2017
Linux: OpenCV and using Lucas-Kanade Optical Flow function.
I used python 2.7 version.
[root@localhost mythcat]# dnf install opencv-python.x86_64
Last metadata expiration check: 0:21:12 ago on Sat Feb 25 23:26:59 2017.
Dependencies resolved.
================================================================================
Package Arch Version Repository Size
================================================================================
Installing:
opencv x86_64 3.1.0-8.fc25 fedora 1.8 M
opencv-python x86_64 3.1.0-8.fc25 fedora 376 k
python2-nose noarch 1.3.7-11.fc25 updates 266 k
python2-numpy x86_64 1:1.11.2-1.fc25 fedora 3.2 M
Transaction Summary
================================================================================
Install 4 Packages
Total download size: 5.6 M
Installed size: 29 M
Is this ok [y/N]: y
Downloading Packages:
(1/4): opencv-python-3.1.0-8.fc25.x86_64.rpm 855 kB/s | 376 kB 00:00
(2/4): opencv-3.1.0-8.fc25.x86_64.rpm 1.9 MB/s | 1.8 MB 00:00
(3/4): python2-nose-1.3.7-11.fc25.noarch.rpm 543 kB/s | 266 kB 00:00
(4/4): python2-numpy-1.11.2-1.fc25.x86_64.rpm 2.8 MB/s | 3.2 MB 00:01
--------------------------------------------------------------------------------
Total 1.8 MB/s | 5.6 MB 00:03
Running transaction check
Transaction check succeeded.
Running transaction test
Transaction test succeeded.
Running transaction
Installing : python2-nose-1.3.7-11.fc25.noarch 1/4
Installing : python2-numpy-1:1.11.2-1.fc25.x86_64 2/4
Installing : opencv-3.1.0-8.fc25.x86_64 3/4
Installing : opencv-python-3.1.0-8.fc25.x86_64 4/4
Verifying : opencv-python-3.1.0-8.fc25.x86_64 1/4
Verifying : opencv-3.1.0-8.fc25.x86_64 2/4
Verifying : python2-numpy-1:1.11.2-1.fc25.x86_64 3/4
Verifying : python2-nose-1.3.7-11.fc25.noarch 4/4
Installed:
opencv.x86_64 3.1.0-8.fc25 opencv-python.x86_64 3.1.0-8.fc25
python2-nose.noarch 1.3.7-11.fc25 python2-numpy.x86_64 1:1.11.2-1.fc25
Complete!
[root@localhost mythcat]#
This is my test script with opencv to detect flow using Lucas-Kanade Optical Flow function.This tracks some points in a black and white video.
First you need:
- one black and white video;
- not mp4 file type file;
- the color args need to be under 4 ( see is 3);
- I used this video:
I used cv2.goodFeaturesToTrack().
We take the first frame, detect some Shi-Tomasi corner points in it, then we iteratively track those points using Lucas-Kanade optical flow.
The function cv2.calcOpticalFlowPyrLK() we pass the previous frame, previous points and next frame.
The returns next points along with some status numbers which has a value of 1 if next point is found, else zero.
That iteratively pass these next points as previous points in next step.
See the code below:
import numpy as np
import cv2
cap = cv2.VideoCapture('candle')
# params for ShiTomasi corner detection
feature_params = dict( maxCorners = 77,
qualityLevel = 0.3,
minDistance = 7,
blockSize = 7 )
# Parameters for lucas kanade optical flow
lk_params = dict( winSize = (17,17),
maxLevel = 1,
criteria = (cv2.TERM_CRITERIA_EPS | cv2.TERM_CRITERIA_COUNT, 10, 0.03))
# Create some random colors
color = np.random.randint(0,255,(100,3))
# Take first frame and find corners in it
ret, old_frame = cap.read()
old_gray = cv2.cvtColor(old_frame, cv2.COLOR_BGR2GRAY)
p0 = cv2.goodFeaturesToTrack(old_gray, mask = None, **feature_params)
# Create a mask image for drawing purposes
mask = np.zeros_like(old_frame)
while(1):
ret,frame = cap.read()
frame_gray = cv2.cvtColor(frame, cv2.COLOR_BGR2GRAY)
# calculate optical flow
p1, st, err = cv2.calcOpticalFlowPyrLK(old_gray, frame_gray, p0, None, **lk_params)
# Select good points
good_new = p1[st==1]
good_old = p0[st==1]
# draw the tracks
for i,(new,old) in enumerate(zip(good_new,good_old)):
a,b = new.ravel()
c,d = old.ravel()
mask = cv2.line(mask, (a,b),(c,d), color[i].tolist(), 2)
frame = cv2.circle(frame,(a,b),5,color[i].tolist(),-1)
img = cv2.add(frame,mask)
cv2.imshow('frame',img)
k = cv2.waitKey(30) & 0xff
if k == 27:
break
# Now update the previous frame and previous points
old_gray = frame_gray.copy()
p0 = good_new.reshape(-1,1,2)
cv2.destroyAllWindows()
cap.release()
The output of this file is:Wednesday, November 30, 2016
OpenGL and OpenCV with python 2.7 - part 004.
The goal of this tutorial is the download and load into the python script of a youtube video.
To do that we need another two modules python.
First, I download and install the python 2.7.12 32 bit version from the internet.
C:\Python27>python.exe
Python 2.7.12 (v2.7.12:d33e0cf91556, Jun 27 2016, 15:19:22) [MSC v.1500 32 bit (
Intel)] on win32
Type "help", "copyright", "credits" or "license" for more information.
First update the pip tool and install numpy python module:
C:\Python27\Scripts>python -m pip install --upgrade pip
Collecting pip
Downloading pip-9.0.1-py2.py3-none-any.whl (1.3MB)
100% |################################| 1.3MB 419kB/s
Installing collected packages: pip
Found existing installation: pip 8.1.1
Uninstalling pip-8.1.1:
Successfully uninstalled pip-8.1.1
Successfully installed pip-9.0.1
C:\Python27\Scripts>pip install numpy
Collecting numpy
Downloading numpy-1.11.2-cp27-none-win32.whl (6.5MB)
100% |################################| 6.5MB 79kB/s
Installing collected packages: numpy
Successfully installed numpy-1.11.2
The main reason to have the numpy python module: it is often used with OpenCV python module.
For OpenCV python module installation you need to see my tutorial.
After you install it, test the OpenCV python module:
C:\Python27>python.exe
Python 2.7.12 (v2.7.12:d33e0cf91556, Jun 27 2016, 15:19:22) [MSC v.1500 32 bit (
Intel)] on win32
Type "help", "copyright", "credits" or "license" for more information.
>>> import cv2
>>> print cv2.__version__
3.0.0
Install pafy python module.
This module help you to download video from youtube but you need also the youtube-dl python module.
So let's install the youtube-dl and pafy python modules.
C:\Python27>cd Scripts
C:\Python27\Scripts>pip install youtube-dl
Collecting youtube-dl
Downloading youtube_dl-2016.12.1-py2.py3-none-any.whl (1.5MB)
100% |################################| 1.5MB 377kB/s
Installing collected packages: youtube-dl
Successfully installed youtube-dl-2016.12.1
C:\Python27\Scripts>pip install pafy
Collecting pafy
Downloading pafy-0.5.2-py2.py3-none-any.whl
Installing collected packages: pafy
Successfully installed pafy-0.5.2
I make a simple python script named: get_yt.py.
The source code of this script is simple:
import os
import pafy
# Download the video
video = pafy.new('https://www.youtube.com/watch?v=O5VCjktWVD4')
print "video.title"
print video.title
print "video.rating"
print video.rating
print "video.viewcount, video.author, video.length"
print video.viewcount, video.author, video.length
print "video.duration, video.likes, video.dislikes"
print video.duration, video.likes, video.dislikes
print "video.description"
print video.description
resolution = video.getbestvideo(preftype="mp4")
print "resolution"
print resolution
input_movie = resolution.download(quiet=False)
print "input_movie"
print input_movie
print "delete movie"
os.remove(input_movie)
I used the URL of a video clip from youtube channel of Arden Cho to tested.
If you want to keep the video into your folder just remove the last line from the python script.
The result is this output:
C:\Python27>python.exe get_yt.py
video.title
Can't Help Falling in Love With You - Arden Cho
video.rating
4.99041318893
video.viewcount, video.author, video.length
10980 ardenBcho 168
video.duration, video.likes, video.dislikes
00:02:48 1665 4
video.description
Recorded this song a couple months ago when I was in Boston, this song always reminds
me of holidays and love so sharing that with you!
Guitar by Koo Chung https://youtube.com/koochung
Violin and Video editing/production by Daniel Jang https://www.youtube.com/metal
sides
Production + Keys by Tim Bongiovanni https://www.northgateproductions.net
Filmed by Rob Mark https://www.instagram.com/rmarq_
If you like my music comment and SHARE! You can also support me by buying & rati
ng my album on iTunes!! https://itunes.apple.com/us/album/my-true-happy/id592588
859
You can follow me at: SnapChat: ardencho
http://www.instagram.com/arden_cho
http://www.facebook.com/hiardencho
http://www.twitter.com/arden_cho
http://www.imdb.me/ardencho
resolution
video:mp4@1920x1080
input_movie5 Bytes [100.00%] received. Rate: [5371 KB/s]. ETA: [0 secs]
Can't Help Falling in Love With You - Arden Cho.mp4
delete movie
Thursday, September 8, 2016
OpenGL and OpenCV with python 2.7 - part 003.
This source code will cut the background of webcam.
The webcam output is take by VideoCapture function.
This part of source code: np.zeros((1,65),np.float64) will return a new array of given shape and type, filled with zeros.
The result of this parts is used with function grabCut from cv2 python module.
This is the source code:
import numpy as np
import cv2
cap = cv2.VideoCapture(0)
while(True):
ret, img = cap.read()
#img = cv2.imread('test002.jpg')
mask = np.zeros(img.shape[:2],np.uint8)
bgdModel = np.zeros((1,65),np.float64)
fgdModel = np.zeros((1,65),np.float64)
rect = (50,50,450,290)
cv2.grabCut(img,mask,rect,bgdModel,fgdModel,5,cv2.GC_INIT_WITH_RECT)
mask2 = np.where((mask==2)|(mask==0),0,1).astype('uint8')
img = img*mask2[:,:,np.newaxis]
cv2.imshow('frame',img)
if 0xFF & cv2.waitKey(5) == 27:
break
cap.release()
cv2.destroyAllWindows()
The end result will be something like:Wednesday, July 6, 2016
OpenCV with cutting video background.
import cv2
from cv2 import *
import numpy as np
cap = cv2.VideoCapture("avi_test_001.avi")
while(True):
ret, img = cap.read()
mask = np.zeros(img.shape[:2],np.uint8)
bgdModel = np.zeros((1,65),np.float64)
fgdModel = np.zeros((1,65),np.float64)
rect = (50,50,450,290)
cv2.grabCut(img,mask,rect,bgdModel,fgdModel,5,cv2.GC_INIT_WITH_RECT)
mask2 = np.where((mask==2)|(mask==0),0,1).astype('uint8')
img = img*mask2[:,:,np.newaxis]
cv2.imshow('frame',img)
if 0xFF & cv2.waitKey(5) == 27:
break
cap.release()
cv2.destroyAllWindows()
Saturday, June 25, 2016
OpenGL and OpenCV with python 2.7 - part 002.
One is this error I got with cv2.VideoCapture. When I try to used with load video and createBackgroundSubtractorMOG2() i got this:
cv2.error: C:\builds\master_PackSlaveAddon-win64-vc12-static\opencv\modules\highgui\src\window.cpp:281: error: (-215) size.width<0 amp="" cv::imshow="" function="" i="" in="" size.height="">0>
You need also to have opencv_ffmpeg310.dll and opencv_ffmpeg310_64.dll into your Windows C:\Windows\System32, this will help me to play videos.
Now make sure you have the opencv version 3.1.0 because opencv come with some changes over python.
C:\Python27\python
Python 2.7.8 (default, Jun 30 2014, 16:08:48) [MSC v.1500 64 bit (AMD64)] on win32
Type "help", "copyright", "credits" or "license" for more information.
>>>import cv2
>>>print cv2.__version__
3.1.0
You can take some infos from about opencv python module - cv2 with:
>>>cv2.getBuildInformation()
...
>>>cv2.getCPUTickCount()
...
>>>print cv2.getNumberOfCPUs()
...
>>>print cv2.ocl.haveOpenCL()
True
You can also see some error by disable OpenCL:
>>>cv2.ocl.setUseOpenCL(False)
>>>print cv2.ocl.useOpenCL()
False
Now will show you how to use webcam gray and color , and play one video:
webcam color
import numpy as np
import cv2
cap = cv2.VideoCapture(0)
while(True):
ret, frame = cap.read()
cv2.imshow('frame',frame)
if 0xFF & cv2.waitKey(5) == 27:
break
cap.release()
cv2.destroyAllWindows()
webcam gray
import numpy as np
import cv2
cap = cv2.VideoCapture(0)
while(True):
ret, frame = cap.read()
gray = cv2.cvtColor(frame, cv2.COLOR_BGR2GRAY)
cv2.imshow('frame',gray)
if 0xFF & cv2.waitKey(5) == 27:
break
cap.release()
cv2.destroyAllWindows()
play video
import cv2
from cv2 import *
capture = cv2.VideoCapture("avi_test_001.avi")
while True:
ret, img = capture.read()
cv2.imshow('some', img)
if 0xFF & cv2.waitKey(5) == 27:
break
cv2.destroyAllWindows()
Wednesday, June 22, 2016
OpenGL and OpenCV with python 2.7 - part 001.
C:\Python27>python
Python 2.7.8 (default, Jun 30 2014, 16:08:48) [MSC v.1500 64 bit (AMD64)] on win32
Type "help", "copyright", "credits" or "license" for more information.
>>>
You need also to download the OpenCV version 3.0 from here.
Then run the executable into your folder and get cv2.pyd file from \opencv\build\python\2.7\x64 and paste to \Python27\Lib\site-packages.
If you use then use 32 bit python version then use this path: \opencv\build\python\2.7\x86.
Use pip to install next python modules:
C:\Python27\Scripts>pip install PyOpenGL
...
C:\Python27\Scripts>pip install numpy
...
C:\Python27\Scripts>pip install matplotlib
...
Let's see how is working OpenGL:
C:\Python27>python
Python 2.7.8 (default, Jun 30 2014, 16:08:48) [MSC v.1500 64 bit (AMD64)] on win32
Type "help", "copyright", "credits" or "license" for more information.
>>> import OpenGL
>>> import numpy
>>> import matplotlib
>>> import cv2
>>> from OpenGL import *
>>> from numpy import *
>>> from matplotlib import *
>>> from cv2 import *
You can also use dir(module) to see more. You can import all from GL, GLU and GLUT.
>>> dir(OpenGL)
['ALLOW_NUMPY_SCALARS', 'ARRAY_SIZE_CHECKING', 'CONTEXT_CHECKING', 'ERROR_CHECKING', 'ERROR_LOGGING', 'ERROR_ON_COPY', 'FORWARD_COMPATIBLE_ONLY', 'FULL_LOGGING', 'FormatHandler', 'MODULE_ANNOTATIONS', 'PlatformPlugin', 'SIZE_1_ARRAY_UNPACK', 'STORE_POINTERS', 'UNSIGNED_BYTE_IMAGES_AS_STRING', 'USE_ACCELERATE', 'WARN_ON_FORMAT_UNAVAILABLE', '__builtins__', '__doc__', '__file__', '__name__', '__package__', '__path__', '__version__', '_bi', 'environ_key', 'os', 'plugins', 'sys', 'version']
>>> from OpenGL.GL import *
>>> from OpenGL.GLU import *
>>> from OpenGL.GLUT import *
>>> from OpenGL.WGL import *
If you are very good with python OpenGL module then you can import just like this example:
>>> from OpenGL.arrays import ArrayDatatype
>>> from OpenGL.GL import (GL_ARRAY_BUFFER, GL_COLOR_BUFFER_BIT,
... GL_COMPILE_STATUS, GL_FALSE, GL_FLOAT, GL_FRAGMENT_SHADER,
... GL_LINK_STATUS, GL_RENDERER, GL_SHADING_LANGUAGE_VERSION,
... GL_STATIC_DRAW, GL_TRIANGLES, GL_TRUE, GL_VENDOR, GL_VERSION,
... GL_VERTEX_SHADER, glAttachShader, glBindBuffer, glBindVertexArray,
... glBufferData, glClear, glClearColor, glCompileShader,
... glCreateProgram, glCreateShader, glDeleteProgram,
... glDeleteShader, glDrawArrays, glEnableVertexAttribArray,
... glGenBuffers, glGenVertexArrays, glGetAttribLocation,
... glGetProgramInfoLog, glGetProgramiv, glGetShaderInfoLog,
... glGetShaderiv, glGetString, glGetUniformLocation, glLinkProgram,
... glShaderSource, glUseProgram, glVertexAttribPointer)
Most of this OpenGL need to have a valid OpenGL rendering context.
For example you can test it with WGL ( WGL or Wiggle is an API between OpenGL and the windowing system interface of Microsoft Windows):
>>> import OpenGL
>>> from OpenGL import *
>>> from OpenGL import WGL
>>> print WGL.wglGetCurrentDC()
None
Now , let's see the OpenCV python module with s=one simple webcam python script:
import numpy as np
import cv2
cap = cv2.VideoCapture(0)
while(True):
ret, frame = cap.read()
gray = cv2.cvtColor(frame, cv2.COLOR_BGR2GRAY)
cv2.imshow('frame',gray)
if cv2.waitKey(1) & 0xFF == ord('q'):
break
cap.release()
cv2.destroyAllWindows()
This is result of my webcam:Monday, July 8, 2013
Using findContours from OpenCV python module.
Today I will show something nice about OpenCV Analysis and Shape Descriptors.
This function finds contours in a binary image.
All detected contours is stored as a vector of points for each contour.
#!/usr/bin/python2.7
import cv2
im = cv2.imread('your_image.jpg')
img_gray = cv2.cvtColor(im,cv2.COLOR_RGB2GRAY)
ret,thresh = cv2.threshold(img_gray,127,255,0)
contours, hierarchy = cv2.findContours(thresh,cv2.RETR_TREE,cv2.CHAIN_APPROX_SIMPLE)
cv2.drawContours(im,contours,-1,(250,250,250),2)
cv2.imshow('your_image.jpg',im)
cv2.waitKey()
cv2.destroyAllWindows()
If you got this error:
findContours error 'support only 8uC1 images'
then the main reason it's findContours requires a monochrome image.
Let's see the result of the python script.
The contour it's draw with 250,250,250 color.
Thursday, August 30, 2012
Python script using OpenCV to detect / recognition faces on photos
This is old tutorial make long time ago by me to detect faces on photos.
If you know more about OpenCV module , then is easy to understand source code.
First I load the modules:
import opencv.cv as cv
import opencv.highgui as gui
import opencv
Next I set the variables and data blocks processed some particular features of the modules loaded.
hc = cv.cvLoad("haarcascade_frontalface_default.xml")
img = gui.cvLoadImage("me.jpg",cv.CV_BGR2RGB)
storage = cv.cvCreateMemStorage(0)
cascade = cv.cvLoadHaarClassifierCascade('haarcascade_frontalface_alt.xml',cv.cvSize(1, 1))
grayscale = cv.cvCreateImage(cv.cvSize(img.width, img.height), 8, 1)
cv.cvCvtColor(img, grayscale, cv.CV_BGR2GRAY)
This is part where is detect faces and save the output like a jpeg image.
faces = cv.cvHaarDetectObjects(grayscale, cascade,\
storage,1.2,2,cv.CV_HAAR_DO_CANNY_PRUNING, cv.cvSize(5, 5))
if faces:
for i in faces:
cv.cvRectangle(img, cv.cvPoint( int(i.x), int(i.y)),cv.cvPoint(int(i.x + i.width), int(i.y + i.height)),cv.CV_RGB(0, 255, 0), 3, 8, 0)
gui.cvSaveImage("faces_detected.jpg", img)
The haarcascade_frontalface_default.xml file it's from internet, but you can create one if you want.
Maybe in the next tutorial I will show how.
Let's see the result. The input image file is:
... and the result is: